Running a Node.js Miner for Nimiq
Nimiq Mining via Node.js
In this guide, we describe the steps required to configure a Node.js miner for Nimiq running on a server. Nimiq is the first blockchain built to be native to the Web platform. Since it is implemented in JavaScript, it is possible to mine Nimiq directly from the Web browser by simply going to a Website. However, a mining client is also implemented in Node.js, which is a cross-platform JavaScript run-time environment for executing JavaScript code server-side.
Dedicated miners may want to set up a mining machine that runs the Node.js miner instead as it is faster while not requiring the browser to be open all the time. In this guide, we explain how to configure the Node.js miner for Nimiq.
Difficulty: low/intermediate (you should be comfortable working in the UNIX environment).
1. Getting Started
The following are the pre-requisites to running the Node.js miner for Nimiq:
- A server with a public IP address. Alternatively, you may be able to use a Virtual Private Server (VPS) to mine.
-
Many VPS providers have terms-of-service that explicitly prohibit cryptocurrency mining and may suspend or limit your account upon excessive CPU usage, so if you want to do cloud mining, usually you need to get dedicated servers online.
- Ubuntu Linux 16.04 LTS, although other versions should work too.
Ensure that you can connect to the server via SSH from the terminal. Windows users may wish to use PuTTY.
2. Securing the Server
Since the server is going to be connected to the Internet constantly, it is important to secure it. To do that, we set up Uncomplicated Firewall (ufw) to restrict connections to/from the server, and run the Node.js miner under a non-root user account. Since it is not a good idea to run the miner under the root account, here we create a new ‘nimiq’ user account. Type the command below to create a new user account, then fill in the password (you can leave everything else blank).
$ adduser nimiq
Assign sudo privileges to this user so it is possible to run commands with superuser privileges.
$ usermod -aG sudo nimiq
Exit, and connect again via SSH as the newly created nimiq user (you can also use ssh-copy-id if you already have your SSH keys and do not want to keep typing login password). In this guide, we will use 51.15.206.160 as an example throughout – but it should be different to yours.
$ ssh [email protected]
In Ubuntu, we can use Uncomplicated Firewall (ufw) – a frontend for iptables that provides an easy to use interface for people unfamiliar with firewall. Type the commands below in the shell to enable ufw. By default, ufw will deny all incoming connections and allow all outgoing connections, so we need to allow basic SSH connections (otherwise we won’t be able to connect to our server). In the last command, the status from ufw should show as ‘active’.
$ sudo apt-get install ufw
$ sudo ufw allow ssh
$ sudo ufw enable
$ sudo ufw status
To run a NodeJs Client you will need a publicly routable IP, Domain and SSL Certificate (get a free one at letsencrypt.org), so in the next section we describe how to configure these.
3. Obtain a Domain Name
Before we can get the SSL certificate that we need to run our miner, we need a domain name. You could register for a domain name from many places, like GoDaddy, NameCheap, etc. Once the domain name is registered, you need to configure the DNS record for Letsencrypt (see here for a guide).
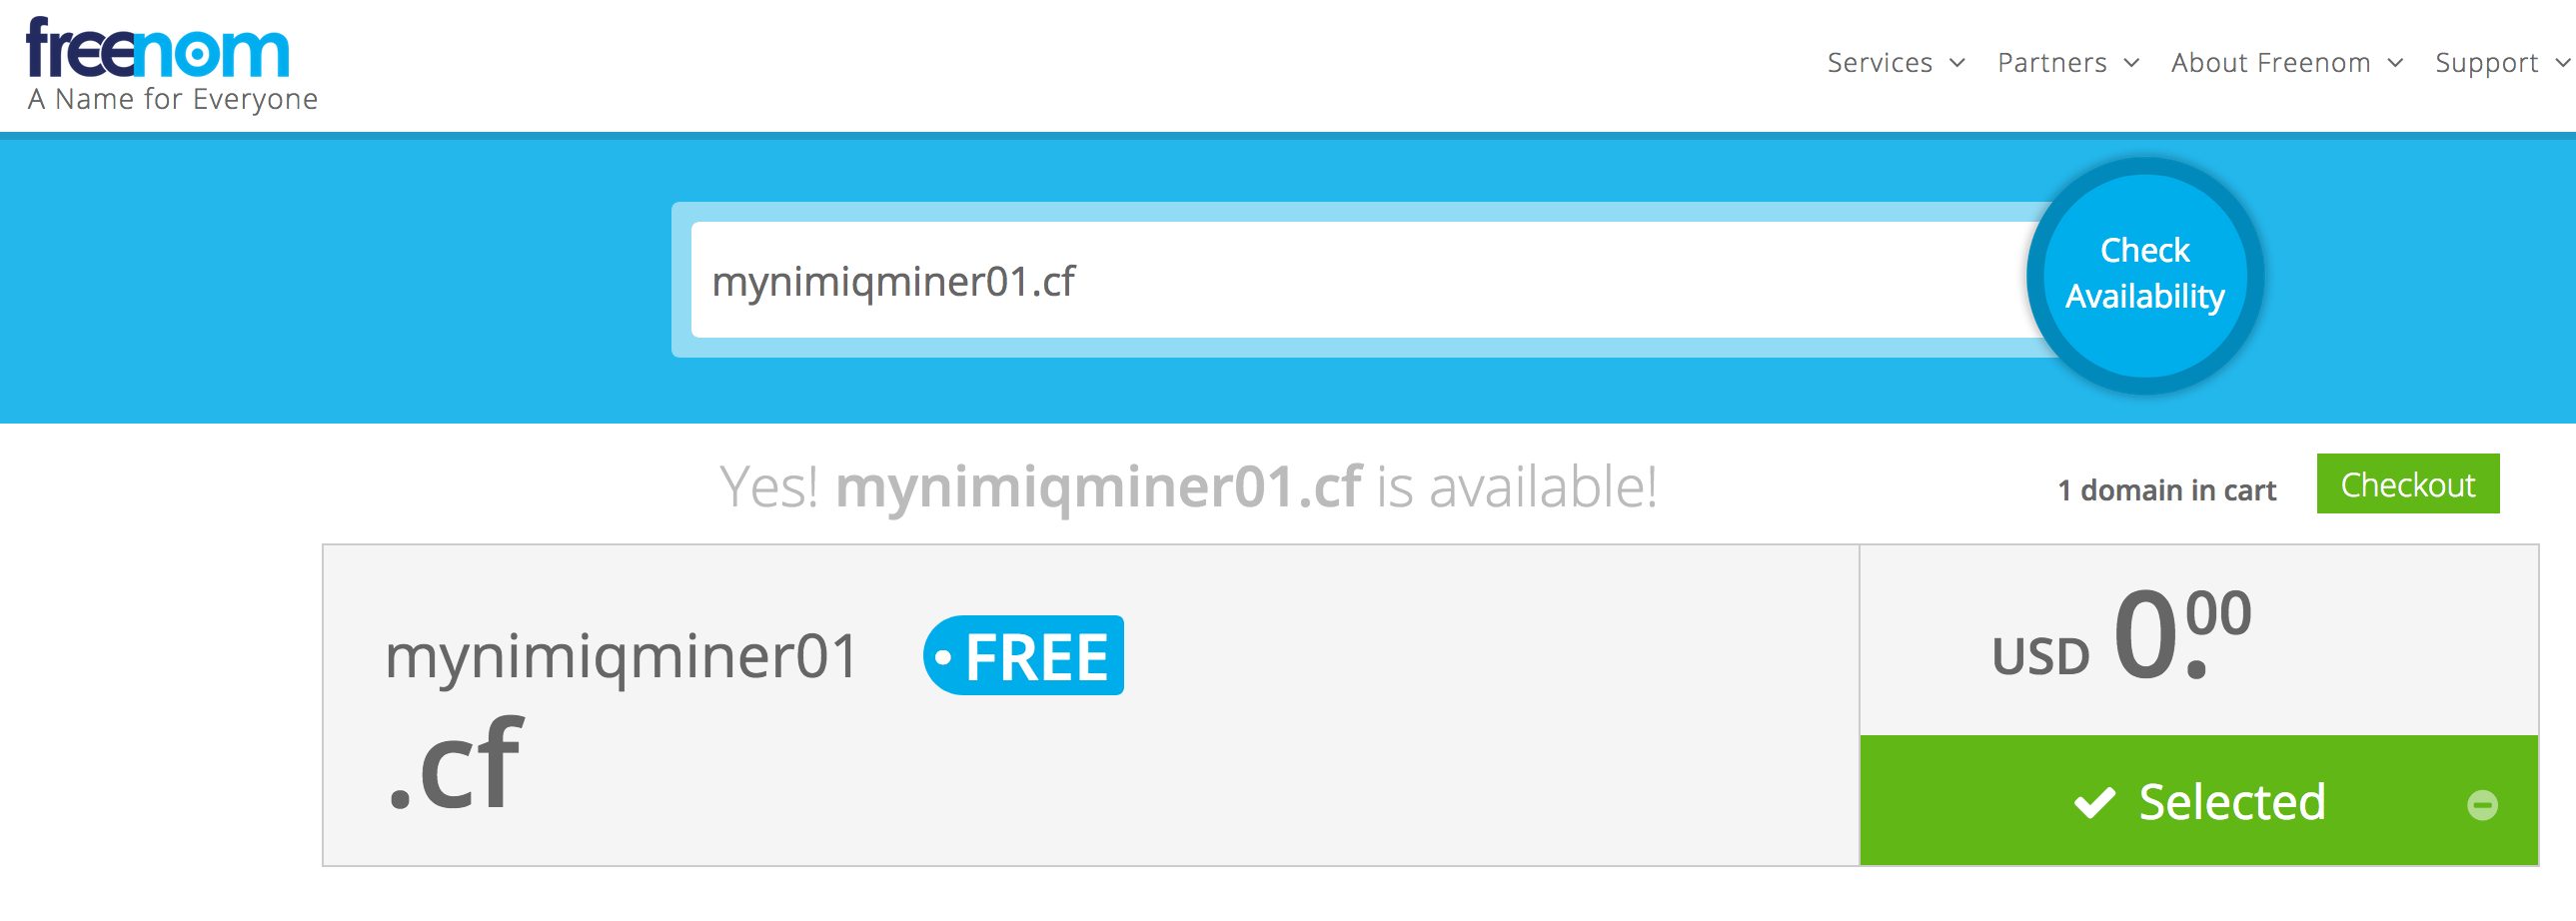
Otherwise, if you do not wish to spend any money, you could register for a free domain name from Dot.tk. As an example, the screenshot below shows how we register for mynimiqminer01.cf from Dot.tk.
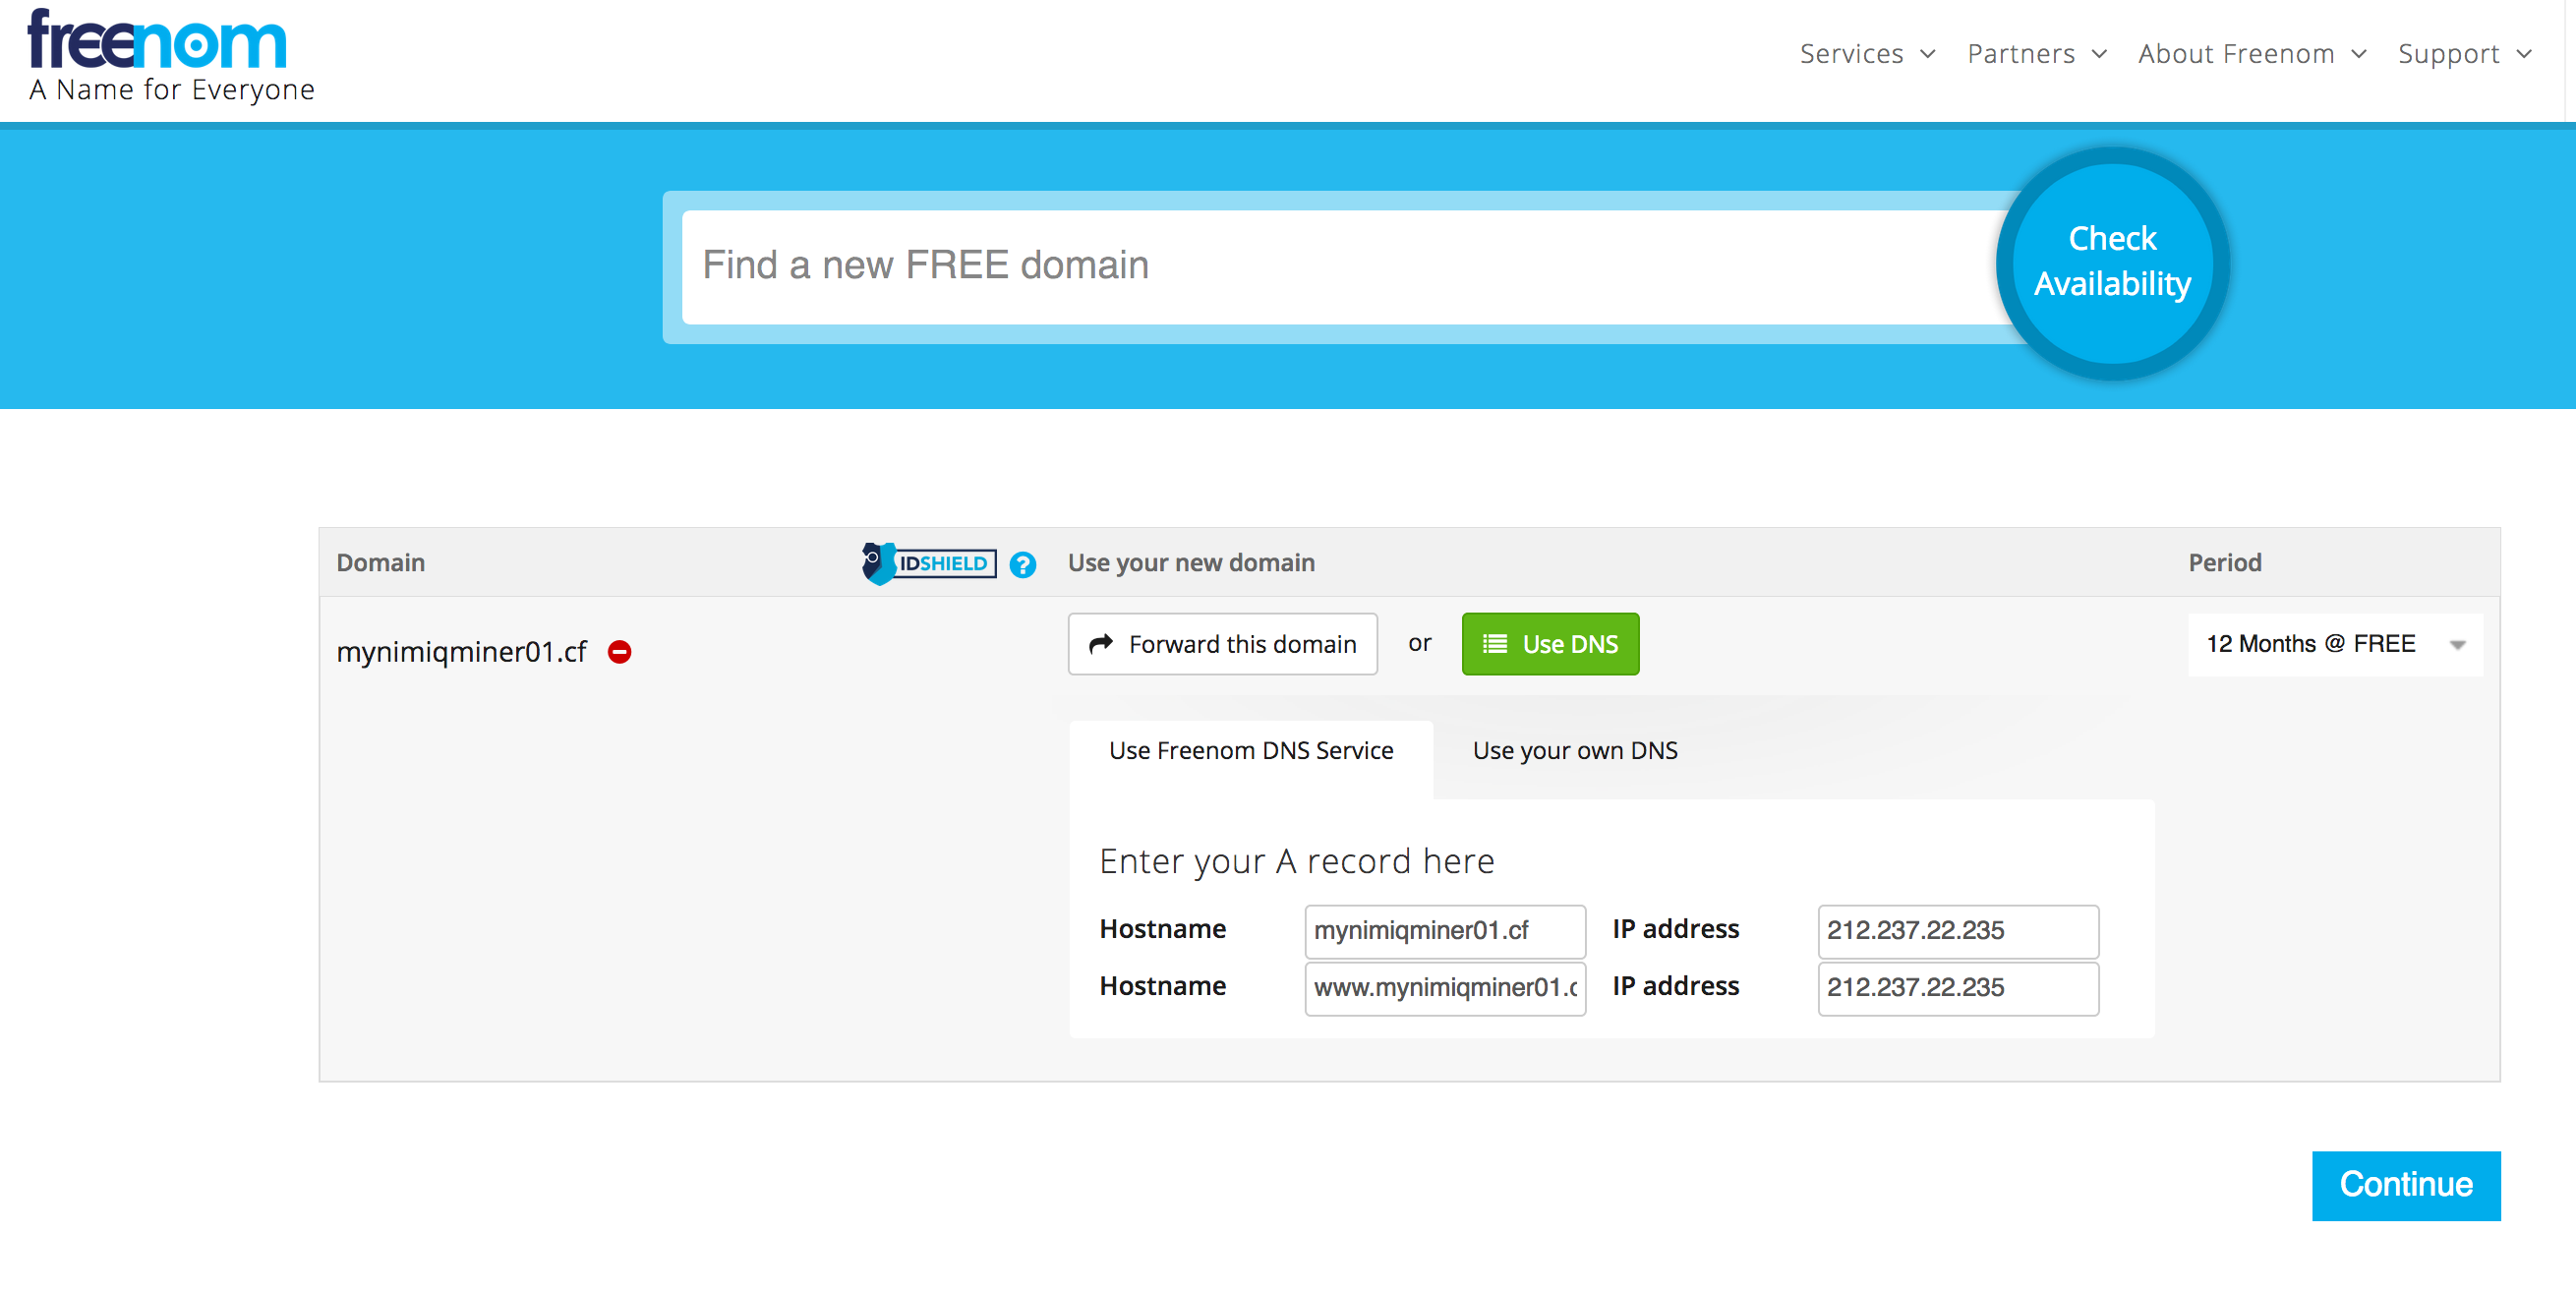
From the next page of the registration page, make sure to select the Use DNS option, and enter the IP address of your server in the A record fields. You need to add two A records to connect the IP to the domain name, one that starts with ‘www’ (e.g. http://www.mynimiqminer01.cf) and another with nothing before it (e.g. http://mynimiqminer01.cf). Finish the registration process. You could use whois to confirm that the registration has been processed – usually after 15 minutes or so.
The free DNS provider (FreeNOM) does not like it if we are squatting on domain that does not have an accessible website, so we are also going to set up a placeholder page using Nginx. If you are using a paid domain, you can skip this step (but you should still open port 80 and 443 anyway for the Freenom to work). Connect to the server again via SSH and type the following commands to install Nginx:
$ sudo apt-get update
$ sudo apt-get install nginx
Now we need to adjust the firewall again to open port 80 (http) and 443 (https).
$ sudo ufw app list
$ sudo ufw allow ‘Nginx Full’
$ sudo ufw status
If Nginx is running correctly, you should see a welcome message by going to the IP address of the server from your browser. Once the domain name has been registered, you could go to that domain name from your browser as well. For e.g. 51.15.206.160, mynimiqminer01.cf and www.mynimiqminer01.cf all load the welcome page for Nginx that we set up in the earlier sections.
4. Generate Let’s Encrypt SSL Certificate
Now we need to get an SSL certificate (issued by Let’s Encrypt) using the EFF’s Certbot. Note that you need port 80 and 443 open. Refer to the last part of Step 3 if you have not done so. Next, type the following commands to install the certbot:
$ sudo apt-get update
$ sudo apt-get install software-properties-common
$ sudo add-apt-repository ppa:certbot/certbot
$ sudo apt-get update
$ sudo apt-get install certbot
To obtain a cert using a built-in “standalone” webserver (you may need to temporarily stop your existing webserver, if any) for example.com and www.example.com, we type the following commands (shown here for mynimiqminer01.cf). Enter your email, accept the agreement and take note of the output of certbot.
$ sudo certbot certonly --standalone -d mynimiqminer01.cf -d www.mynimiqminer01.cf
IMPORTANT NOTES:
- Congratulations! Your certificate and chain have been saved at:
/etc/letsencrypt/live/mynimiqminer01.cf/fullchain.pem
Your key file has been saved at:
/etc/letsencrypt/live/mynimiqminer01.cf/privkey.pem
Your cert will expire on 2018-03-22. To obtain a new or tweaked
version of this certificate in the future, simply run certbot
again. To non-interactively renew *all* of your certificates, run
"certbot renew"
- Your account credentials have been saved in your Certbot
configuration directory at /etc/letsencrypt. You should make a
secure backup of this folder now. This configuration directory will
also contain certificates and private keys obtained by Certbot so
making regular backups of this folder is ideal.
Note: If you encounter an error along the lines of “Can not bind port 80” it’s due to Nginx (that we installed before) running on port 80 already. So before starting certbot, stop Nginx with sudo service nginx stop and start it again when certbot is finished via sudo service nginx start.
Next, we verify that auto-renewal works. You should not see any error from the command below.
$ sudo certbot renew --dry-run
We also need to set the permission so non-root users can access these certificate files.
$ sudo chmod 755 /etc/letsencrypt/live
$ sudo chmod 755 /etc/letsencrypt/archive
5. Installing Nimiq Node.js Miner
Now we have everything we need to install the Node.js server and run the Node.js miner for Nimiq! To begin with, first we install version 8 and above of Node.js using the following commands:
$ curl -sL https://deb.nodesource.com/setup_9.x -o nodesource_setup.sh
$ sudo bash nodesource_setup.sh
$ sudo apt-get install nodejs build-essential git
Next, using Node Package Manager (npm), we install Gulp – a toolkit for automating painful or time-consuming tasks in development workflow – globally for all users.
$ sudo npm install -g gulp
And in the same way install yarn.
$ sudo npm install -g yarn
Finally we can clone the Github repository for nimiq, and checkout the master branch.
$ cd ~
$ git clone https://github.com/nimiq-network/core
$ cd core
$ git checkout release
Install and build the project using yarn.
$ yarn
$ yarn build
To run the Node.js miner for Nimiq, we need a publicly routable IP, a domain name and an SSL certificate. Now we have everything we need! Start the client by running clients/nodejs/nimiq. To adjust the number of threads, provide the option to the miner parameter in the command below, e.g. ‐‐miner=2 to use two threads.
$ cd ~/core/clients/nodejs/
$ nimiq --host mynimiqminer01.cf --port 8080 \
--key /etc/letsencrypt/live/mynimiqminer01.cf/privkey.pem \
--cert /etc/letsencrypt/live/mynimiqminer01.cf/fullchain.pem \
--miner=2 --network='main' --statistics=60
Take note of the first two lines produced by the node command. They show your wallet address that the miner is using. Eventually you should see messages that the blocks are downloading. Wait until you catch up to the latest block at Nimiq Watch. The miner is now running if you see lines that begin with the word ‘Miner’. Congratulations!
As an optional step, you can use PM2, which is a process manager for Node.js applications, to
manage and run the miner as a background service. This is described in the next section of this guide.
[I 05:57:48] Node: Wallet initialized for address NQ36 99EY F5G7 VG20 KDEX RL38 TLVU CCKG C7TF.
[I 05:57:48] Node: Blockchain: height=1, totalWork=1.4116399577030896, headHash=K3Id+E/rgqR8SB8pV0X9Fxv4FxkC5eePu/oXVaj6ZO4=
...
[I 15:20:46] Node: Now at block: 5800
[I 15:20:46] Node: Now at block: 5900
[I 15:20:47] Node: Now at block: 6000
...
[I 15:35:23] Miner: Starting work on  … hashrate=2700 H/s
6. Configuring PM2
Now we want to keep the miner running, even after we disconnect from our SSH session. We can do this through PM2, which is
a process manager for Node.js application. Quit the miner (Ctrl-C) and type the commands below. Note now two dashes (‐‐) are used to separate nimiq and all the parameters that we pass to it.
$ sudo npm install -g pm2
$ pm2 start nimiq -- --host mynimiqminer01.cf --port 8080 \
--key /etc/letsencrypt/live/mynimiqminer01.cf/privkey.pem \
--cert /etc/letsencrypt/live/mynimiqminer01.cf/fullchain.pem \
--miner=2 --network='main' --statistics=60
Ensure that the miner is running correctly under PM2 by looking at the list of applications managed by PM2 and also from the log files. You should not see any error in the log files. Now you can exit the SSH session and the miner will continue running in the background.
$ pm2 list
$ pm2 logs
Optional: we can also make the miner restart automatically upon system restart using PM2 startup. Type the following PM2 startup command, and do what it says to generate the startup script.
To experiment with different numbers of threads and see how it affects your hashrate, you need to stop the Node.js client first and change the –miner parameter, e.g. below we stop and start the miner again with an increased number of workers (from 2 to 4).
$ pm2 stop all
$ pm2 start nimiq -- --host mynimiqminer01.cf --port 8080 \
--key /etc/letsencrypt/live/mynimiqminer01.cf/privkey.pem \
--cert /etc/letsencrypt/live/mynimiqminer01.cf/fullchain.pem \
--miner=4 --network='main' --statistics=60
7. Tips and Hints
a. Nimiq Configuration Options
        Usage:
            node index.js --config=CONFIG [options]
            node index.js --host=HOSTNAME --port=PORT --cert=SSL_CERT_FILE --key=SSL_KEY_FILE [options]
            node index.js --dumb [options]

        Configuration:
          --cert=SSL_CERT_FILE       Certificate file to use. CN should match HOSTNAME.
          --dumb                     Set up a dumb node. Other nodes will not be able\n
                                     to connect to this node, but you may connect to\n
                                     others.
          --host=HOSTNAME            Configure hostname.
          --key=SSL_KEY_FILE         Private key file to use.
          --port=PORT                Specifies which port to listen on for connections.

        Options:
          --help                     Show this usage instructions.
          --log[=LEVEL]              Configure global log level. Not specifying a log
                                     level will enable verbose log output.
          --log-tag=TAG[:LEVEL]      Configure log level for a specific tag.
          --miner[=THREADS]          Activate mining on this node. The miner will be set
                                     up to use THREADS parallel threads.
          --passive                  Do not actively connect to the network and do not
                                     wait for connection establishment.
          --rpc[=PORT]               Start JSON-RPC server on port PORT (default: 8648).
          --metrics[=PORT]           Start Prometheus-compatible metrics server on port
                   [:PASSWORD]       PORT (default: 8649). If PASSWORD is specified, it
                                     is required to be used for username "metrics" via
                                     Basic Authentication.
          --statistics[=INTERVAL]    Output statistics like mining hashrate, current
                                     account balance and mempool size every INTERVAL
                                     seconds.
          --type=TYPE                Configure the consensus type to establish, one of
                                     full (default), light, or nano.
          --wallet-seed=SEED         Initialize wallet using SEED as a wallet seed.
          --wallet-address=ADDRESS   Initialize wallet using ADDRESS as a wallet address
                                     The wallet cannot be used to sign transactions when
                                     using this option.
          --extra-data=EXTRA_DATA    Extra data to add to every mined block.
          --network=NAME             Configure the network to connect to, one of
                                     main (default), test, dev, or bounty.
b. Auto-restarting the miner when the system restarts.
$ pm2 startup systemd
[PM2] Init System found: systemd
[PM2] To setup the Startup Script, copy/paste the following command:
sudo env PATH=$PATH:/usr/bin /usr/lib/node_modules/pm2/bin/pm2 startup systemd -u nimiq --hp /home/nimiq
After that, we can check the status of the systemd unit with systemctl.
$ systemctl status pm2-nimiq
 pm2-nimiq.service - PM2 process manager
   Loaded: loaded (/etc/systemd/system/pm2-nimiq.service; enabled; vendor preset: enabled)
   Active: active (running) since Wed 2017-12-20 16:03:25 CET; 1min 28s ago
     Docs: https://pm2.keymetrics.io/
 Main PID: 10427 (PM2 v2.9.1: God)
   CGroup: /system.slice/pm2-nimiq.service
           ‣ 10427 PM2 v2.9.1: God Daemon (/home/nimiq/.pm2)
Test reboot the server, and make sure that the miner is still running (via PM2 list and top).
c. Increasing the number of threads.
This only applies when you increase the number of workers to a large number, but your hashrate isn’t going up. In this case, it may be because you’re hitting the default limit on the number of workers from libuv. @Marvin from discord says that:
“v8’s libuv limits the thread pool for AsyncWorker’s by default, depending on your system configuration and node build. You can overwrite its default using the environment variable UV_THREADPOOL_SIZE i.e. run the node using env UV_THREADPOOL_SIZE=
nimiq --miner= . Note that using all resources of an machine can render it unusable... 👍"
In this case, set the environmental variable UV_THREADPOOL_SIZE to a larger value before running the Node.js miner.
$ export UV_THREADPOOL_SIZE=4
$ pm2 start nimiq -- --host mynimiqminer01.cf --port 8080 \
--key /etc/letsencrypt/live/mynimiqminer01.cf/privkey.pem \
--cert /etc/letsencrypt/live/mynimiqminer01.cf/fullchain.pem \
--miner=4 --network='main' --statistics=60
Note: You can configure
d. Running the miner locally (not on VPS).
1) With a domain name
There are two options to run a miner on your local network. With a domain name is the best option (see explaination from @Soeren in 2)).
You will need to do a few things to be able to setup your local network for Nimiq mining:
-
Set the DNS record of your domain to your public IP address (see step 3.). Your public IP address is the public IP of your router. The easyest way to know your public ip is to open your favorite searche engine, search “What is my IP” and open the first link.
-
You will need to forward ports on your local network to be able to generate a certificate. Disclaimer: Opening ports can influence the security of your local network! Please be carefull with what you are doing and use this guide at your own risk! You will need to forward ports in your local network. This means that incoming internet traffic will be redirected to a (local) IP in your network. So let’s say your miner is connected on your local network. In this example we will assume that the IP is 192.168.0.125. So you will need to open a few ports for the miner to work. The ports you will need to open are port 80 and port 443. These are the ports used by certbot to get a certificate. You can also open port 22 if you want to use SSH to access your miner remotely. Because there are some many routers and modems out there I suggest going to https://portforward.com/ and find your device there, it should have steps on how to forward ports. If it doesn’t then you should go to the manufacturer’s website or search for your device on google. If you followed the rest of this guide you can check if everything is working by surfing to your domain name, it should show the Nginx welcome page (note that you will have to stop nginx in order to get the certificate).
Steps: 1) Point your domain name to your public IP 2) Open ports 80 and 443, and forward ports to your computer 3) Surf to your domain name -> You have to see nginx landing page 4) Stop Nginx 5) Generate the certificate 6) Start Nginx 7) Start the miner 8) Congratulation, you are mining :)
If you have any problems or remarks feel free to hit me up on discord (@DavGer) => Section completed by @Trigger.
2) With a self-signed SSL certificate
To run it on a personal system and without a domain name, you will need to generate a self-signed SSL certificate and then run the regular command to start the node but replace the domain name with localhost, key with the generated key, and cert with the generated cert.
@Soeren from discord says that:
Also, it’s possible to run the nodejs miner locally with just localhost and a self signed certificate, but it’s just not recommended, because if everybody would do it, the network would centralize, as no clients that run as localhost can connect to each other only to public domains. But it’s possible. I don’t know if anything will be done to prevent that or to fix the not-reachable problem, but at least for testing the nodejs client, you can run it locally without a vps or domain.
e. Import wallet.
If you want to use your own wallet address you need to get the private key. Visit your Nimiq wallet, open the console and run:
$.wallet.dump()
it will return a 64 character long HEX string. This is your private key. Now start the client with an added parameter called --wallet-seed followed your key:
 $ cd ~/core/clients/nodejs/
 $ nimiq --host mynimiqminer01.cf --port 8080 \
 --key /etc/letsencrypt/live/mynimiqminer01.cf/privkey.pem \
 --cert /etc/letsencrypt/live/mynimiqminer01.cf/fullchain.pem \
 --wallet-seed YOUR_PRIVATE_KEY \
 --miner=2 --network='main' --statistics=60
Congratulations. Your Nimiq Node.js miner is now running! You can check how many NIMs you have mined by entering the wallet address used by the miner at block explorer sites, such as Nimiq Watch or nimiq.mopsus.com.